Search This Blog

Saturday 28 June 2014

Dolly

I think it is June, that's what the calendar says. It has been so cold and wet here that I could be forgiven for the confusion, it is more like March than June.
I can't say that I mind too much, it is an excuse to stay indoors letting the garden grow itself into a mess of dandelions and moss. Nothing I can do, it's the wrong weather for gardening :) Well that's my excuse.
I mentioned a week or so back that I wanted to make some amigurumi and today seemed like the perfect time to put my feet up while the rain came down outside and make something 3D! 

Amigurumi is the name given to any crocheted animals, toys etc and is usually all made in double crochet in a spiral with a stitch marker. There are thousands of free patterns out there for amigurumi, many of which are on my list of 'might tries' but I fancied having a go at making one of my very own. I have avoided making anything three dimensional lately as I am running out of places to put things!
So it had to be kept fairly small, I wanted to make a doll/elf/fairy/girl shaped thing and I 
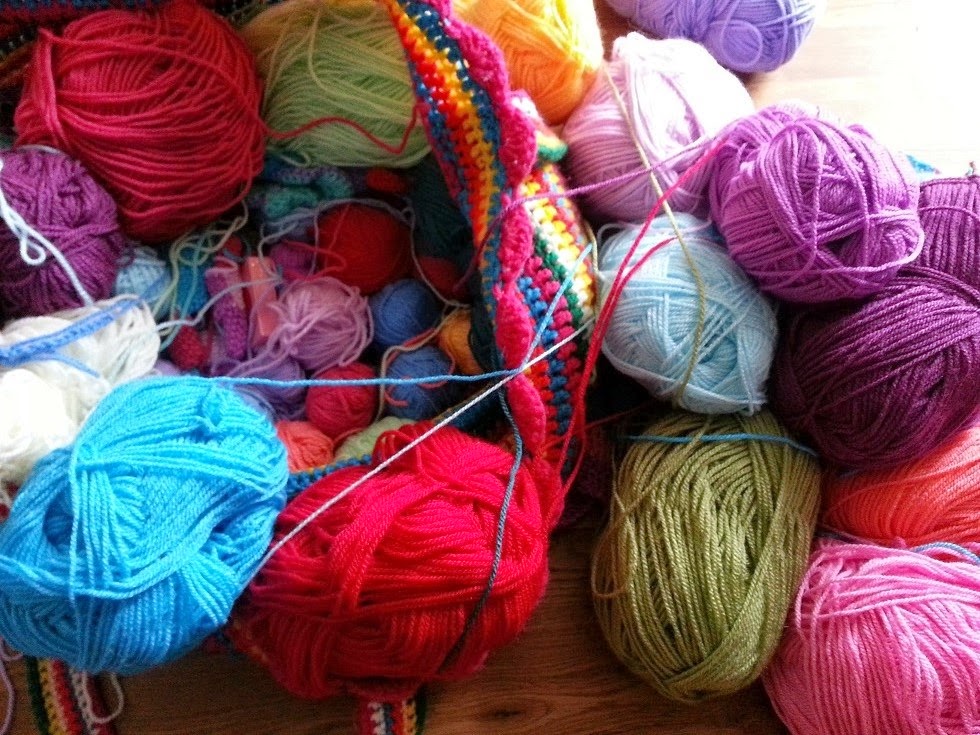
was going to use Drops Cotton Merino as I love the colours and it is so nice to work with.


This is what I made:

I love her stripy draws! 

I constructed her so that she needed the minimum amount of sewing, all the stripes are done in spirals so there aren't hundreds of ends to sew in and even the legs and skirt are all crocheted on. Oh it is good to finish crocheting something and not be left with an hour or two of sewing!
She has found a home on the end of the mantelpiece, she might not stay there but she looks comfy for now.
Her hair was the last thing I did, I wasn't sure how to do it or what colour so I decided to sew on lots of colours and see what happened, I think she turned out quite pretty! I am going to have to think of a name for her though, 'Dolly' is a bit boring.

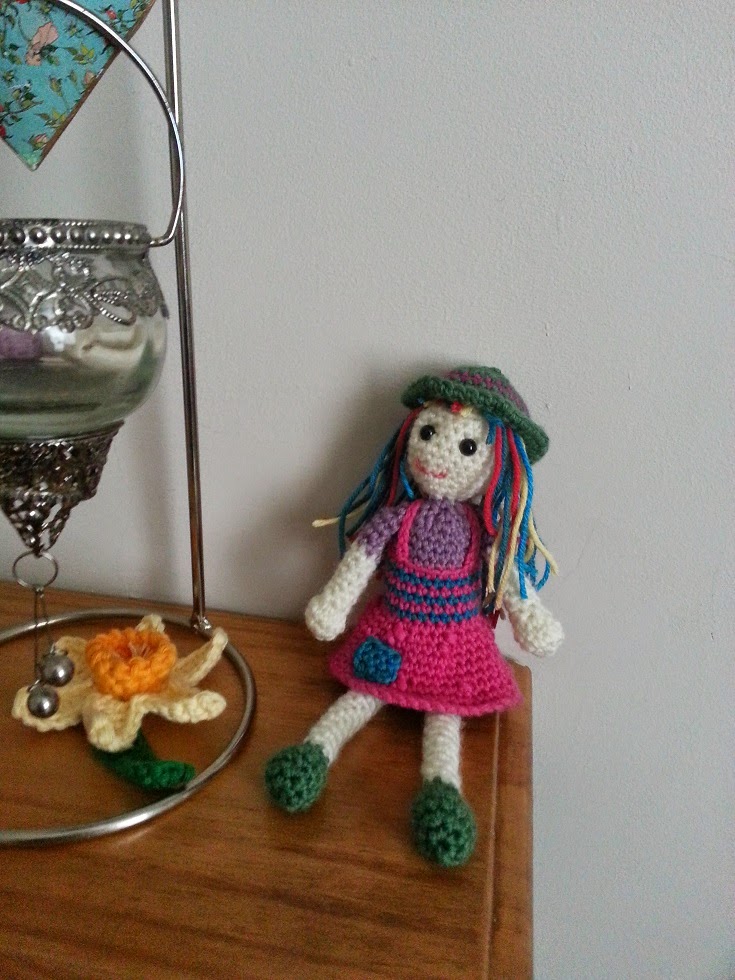
She is a rough draft but I do want to make some more like her. I would like to share the pattern with you but as I didn't take any notes (again) I will have to make another one before I can tell you how to make one as I'm not 100% sure myself. I can see this basic dolly pattern adapted to all sorts of things, fairies, pixies, witches and elves.

So I will carry on hoping for wet weather as a good reason to stay in and crochet :)
XXX

Thursday 26 June 2014

getting my crochet fix

This week has been all about getting a job. Not that I have one yet but I can feel one looming! Don't get me wrong, I have no problem working and as Mr Drops and Debbie Bliss haven't yet hunted me down to be a chief yarn tester, I am going to have to go back to the world of the employed in the near future. I can't help feeling a little bit sad that I will have to give up my days of endless hooky.

Before that all happens I have been getting in as much crocheting as I can, the ripply part of my new blanket is coming on, if a bit slowly:

I am loving getting back into the rhythm of rippling: 1,2,3,4,1,2,3,4,1,2,3,4...

And I have hunted out some granny bunting for a friend that I had kicking about. I have never hung it up before and had to see the effect before it goes to a new home:

Alas I don't think I can get away with having my own granny bunting strung up downstairs, maybe something for the spare room if I ever get it decorated. You might have noticed that I love a bit of bunting!
I have also been mucking around with granny squares and came up with this little fella I am calling my Monster Granny!

This is a very simple variation on the humble granny square. I thought it was quite a fun little thing to make for beginners and children who are learning how to crochet so I have written the pattern up with a few photos and it is available under 'Patterns' on the left sidebar.
He just sort of happened, I found a couple of googly eyes in my purse that I can't remember buying (does anyone else have googly eyes lurking in their purse or is it just me?) and he quickly evolved from there.


Please do send me your pictures of your Monster Granny if you make one, or of anything else you have made from one of my patterns. Those of you that have sent me pictures on Facebook and Twitter, thank you! They are wonderful to see :)
XXX


Tuesday 24 June 2014

More blanketeering

Where has the time gone? I sat down at around lunch time to try and write a pattern and three hours just went in one giant slurp! 

I think I must have got lost in the sums and picture editing - little things that seem to take a long time and I'm only half way through! This is time I would much rather have spent crocheting as yesterday I started my new blanket and I just can't wait to really get on with it. Don't get me wrong, I do enjoy writing patterns but you can't beat a bit of rippling!!!

I just couldn't help myself, it had to be a ripple. The pattern is easy to remember and repetitive but with just enough interest to not be boring to do, it really is very therapeutic.

This is not just going to be a ripple blanket, I am going to make a kind of sampler made up of all different things. I have visions of circle-squares, granny stripes, hearts and flowers all coming together in one big wooly explosion of colour.

I am using the old faithful stylecraft special dk as I have tonnes of it left over from the load I got to do the Granny Chair.

hmm needs a bit of a tidy-up.

It is going to take a while to do, I have no real plan but intend to fall back on the make-it-up-as-you-go-and-hope-for-the-best technique. I love starting a new blanket, a proper big one that is going to take ages, no rush, no deadline just always there to pick up and do a bit, between other things - simple, mindless crochet.

So while all those blanket ideas are bubbling away I will get back to these patterns which hopefully I will be able to share with you soon. 

Oh yes, I found a home of sorts for my last lot of bunting:
Please don't judge me too harshly on the titles of the books, all the rubbish ones belong to my husband ;-)
 
XXX

Saturday 21 June 2014

Home

I've been playing around with this idea for a while now and I really wanted to see what it looked like. You might remember the baby bunting I made for a friend and my 'Merry Christmas' bunting that I made a couple of December's ago:

I LOVE these buntings, they are from Lucy at Attic24's pattern for Jolly Festive bunting. I absolutely adore the bright colours and how neat and pretty the flags are. They are made in Rico Creative cotton, cheap and cheerful (if a bit splitty) and very effective. So this idea I had was to try making some bunting in sightly more muted colours. I am not one for pastels and usually prefer the brightest most vivid colours but I had a couple of balls of cream and this sage colour and I wanted to see what it would look like as bunting. Yesterday morning I started making the little flags and was very happy with how they were coming on.

What should I put on the bunting though? I considered doing a big long one that said 'Home Sweet Home' but that would mean 15 flags (one for each letter plus spaces) and I just didn't have enough cream yarn for that. So I settled on one word 'Home' and a flag either side for decoration.


I ummed and ahhed for a while on which colour to do the lettering in, as each flag was the same I wanted the letters to be the same too. Pastels weren't working as the letters didn't stand out enough, I considered a pale pink and then edging it in a neat row of white stitches to try to bring out the lettering but my hand sewing isn't really neat enough so I soon scrapped that idea. Red looked good and seemed like a nice homely colour, I could stop it looking too christmassy by adding some buttons and bits. 
 The lettering is really easy to do, if a bit fiddly. Simply print out the letters you want off the computer but select to print a mirror image. Then trace that onto the paper side of a sheet of bondaweb. Dry iron that onto the felt, cut out the letters, peal off the paper and wet iron on to the bunting.
 
At this point I could see how the bunting was going to look and I got that giddy, excited feeling that it was all going to work out beautifully!
I picked up some cheap little wooden buttons the other day and they were just perfect for this so I popped one of these on the bottom of each flag. Nearly finished! Just needed to decide what to put on the flag at each end as decoration. I made some flowers, but the pastels just didn't stand out against the bright red lettering, and brighter colours clashed. 

I made some hearts but they weren't right either.

I spent an hour or two messing around, getting frustrated that I couldn't come up with something I liked. At a loss I had a rummage through my ribbon tin and found some blue and red gingham ribbons. Nothing says home like a bit of gingham right? I sewed together little two inch pieces of ribbon to make flowery bow things, aww sweet!
I think the experiment has worked! It is extremely twee, super pretty and not my usual style at all but I absolutely love it!!!

I am not sure what to do with it now, I might be able to find a shelf to hang it on or maybe on the back of a door, or I might give it away.

I think that is me done with this type of bunting for a while, my tension is so tight and crocheting with this yarn really makes my hand hurt so I think I need a bit of light DK acrylic to be going on with.

Hope you have a lovely weekend :)

XXX


Thursday 19 June 2014

Little things

It's been fairly quiet on the crochet front this week for me. With my Granny Chair all finished I have been looking around for something new to get my teeth (and hook) into.  I am taking my time, weighing up the options; blanket, cushion, bag, cardy, more yarnbombing or something altogether different. My bag of stylecraft has been sat next to my usual sofa spot since finishing the chair so I have been picking up different colours and seeing what happens while I mull over all the other possibilities.
This is one of those happenings. I am calling it my Sunny Flower Garland for want of a better name. I think they look nice and big and cheerful, and yes a bit childlike. They are based on the flower I made for my free-from mushroom, that too is very childlike so it has been donated to a friend's daughter :)


I liked that flower so much I wanted to replicate it and write down the pattern in case I ever need it again. The pattern is on the left side-bar so you can make one too!
I am absolutely delighted that some of you have already had a bash at these with some fantastic results. I love seeing the pictures so please do send me them if you make anything of mine.
When I finally get around to decorating our spare room (more commonly known as 'Abi's yarn dump') I will hang these up in there along with all the other little hangy bits that I have made over the last couple of years.

Another thing that happened was this little rainbow bookmark:
Simple but sweet and more than that, useful! I never have a bookmark when I need one and all my Harry Potter's are falling apart with being laid open face-down. Alas it may be too late for them but hopefully this will help prevent the same damage happening to my other books.

I have lots of ideas racing around in my head and while there is nothing else on the go (apart from my flower shawl, my poor neglected, pretty shawl) I want to get some other little things made, it's been ages since I have made any amigurumi and I have an urge to make a dinosaur, or a unicorn, or a dragon, or a bumble bee, or a dalek, or a chicken, or...

XXX

Monday 16 June 2014

Granny Chair Ta-Dah!

Finished!!! I am just going to take a moment to enjoy that feeling. Ah lovely :)

It has been an epic weekend of sewing, sewing and more sewing but the final stitch has just been made so I can at last see if my imagination matches the reality of what I have made.

For those of you that aren't up to speed with this latest project, I acquired an old nursery chair that used to belong to my Granny. It really was not my cup of tea in the pale green that it had been upholstered in, but I absolutely loved this chair; the childhood memories and the shape of it, so I decided to make a new covering and of course that meant a lot of crocheting!


At first I had ideas of random different coloured squares in a patchwork effect, this soon evolved into putting the colours in a graduated spectrum because I just love them like that.

 
The back and the bottom of the chair needed covering too and I settled on a good old fashioned granny stripe for that. The main reason for that choice was it seemed like the easiest way to get the shape I needed.

All the main parts were made, just a marathon of sewing up to do. I got the back and the seat squares together over the weekend and I was so happy with them! Look at how pretty the colours are like this:


Just wonderful. But was it? There is no denying that the squares look good but would they go with the random granny stripes that I had knocked up for the rest of the covering? Last night I was extremely close to throwing the stripy bits away and making new stripes, in a less random colour progression. That seemed like such a waste though so I decided to just sew up what I had and if it didn't work I would just make another covering. It was also at this point that I started to get worried about having shared all the updates so far. I wished I had kept it a secret until it was finished, just in case it turned out horribly!
That isn't what my crochet is about though, it's as much about the process as it is about the end result. Part of that process was putting all the parts together, definitely not as much fun as crocheting but necessary.


Throughout the entire construction of the chair cover I have been measuring it against the chair, making adjustments and seeing how it would work and what I needed to do to make it work. This has involved a lot of pinning, taking it apart, re-pinning and so on. Unfortunately pins don't hold too well with woolly things so for the actual sewing up process I found that making tacks all around the edges, where they had to be sewn together, was the only way of holding all the parts in place.

I started sewing the seat cover to the bottom stripey piece last night and got across one square and realised I had to stop, my eyes had finally stopped working properly after all the square-sewing and I was ruining all my hard work through impatience to get it finished.
Bright and early this morning (with both eyes working as well as they can) I got going again and oh my word it was worth it!

All my worries about it not looking good enough or the stripes not working with the squares are gone and well, it looks even better than it did in my imagination.

Want to see?


Ta-Dah!!!


Where it will probably live...


 In the hunt for better light for pictures on this grey day...

I LOVE IT!!!

I've got yarn-bombing fever, I am now looking around the house trying to think of what I can give the cheerful woolly treatment next! Although I do think I need a break from this type of haphazard crochet and want to make something repetitive that doesn't require a lot of thought, just hooky.

I do hope you like my new Granny Chair, it is now my favourite chair, almost too pretty to sit on, I just want to look at it :)

XXX

Thursday 12 June 2014

Free-form crochet

I've been working to strict patterns lately - mainly stripes and squares and I really needed a break from it. So for a bit of fun I thought I would do a bit of free-form crochet.

Free-form crochet is where you pick up a hook and just make something! There are some amazing pieces on the internet, big spirally patterns in lovely bright colours. I don't know if the idea is to just let your hooky wander and see where it goes or if you should have an idea in mind first. I've not done much of this before and I find it at least helps if I have an idea of the shape I want first.
This was the result of my first successful attempt at free-form crochet, a paisley-doily-type-thing that sits on my mantlepiece waiting for a rare vase of flowers. I love paisley patterns and it was an easy shape to do for a beginner.

So this morning, I reached for my go-to mucking about yarn, Rico creative cotton. The problem with this yarn is it is an aran weight, so things come out huge and it tends to split for anything intricate. I didn't want to use wooly looking DK acrylic which is the only other type of yarn I've got in lots of colours. Then I remembered my flower shawl and all those pretty colours!
(yes it's not finished yet but not forgotten!)

I could spare a little bit of each colour for mucking about, the shawl is quite a bit bigger than that now, it's an old picture so I've got fair bit spare. 

My very talented arty friend Anna posted this wonderful picture of hers on facebook yesterday and it caught my imagination:

With this in mind I decided the shape I wanted to make was a mushroom/toadstool and I wanted it to be pretty and bright. I picked up my hook and started:

It's a bit wobbly and a bit weird, but I love it! I like the way it just grew with no real plan and turned into a cheerful child-like wall hanging. The flower was less random, although I did make it up. It was also the perfect excuse to use these little enameled flower buttons that I had :)
I've given it a press with some spray starch but it is still quite floppy so I will be giving it the heavy duty pinning and PVA glue treatment shortly.


I really enjoy making happy things like this, it serves no purpose and probably will never get hung up, I have far too many things like this to have them all hanging around the house. Great fun to make though and that is the most important thing about crocheting :)

XXX

Edit: It has found a temporary home!

Wednesday 11 June 2014

Fifty!

Hello! Apparently this is my 50th blog post, thank you for reading and following my hooky goings-on :)

When I realised this was my 50th post I had a look back to see what I could have possibly found to write about for all those posts. I surprised myself with all the things I have made and finished since I started this blog. There has been tea cosies, hot air balloons, a rooster, a clock, bags, a cushion, a few blankets and loads more besides. 
I have been busy haven't I?! 

I am so pleased with how popular my patterns have been too, I am really happy that so many people have made the things that I have designed, I do hope those of you that have tried them have enjoyed making them. I am playing with a couple of ideas at the moment so hope to be adding more patterns soon. I would love to see pictures of the things you have made either following my patterns or adapting them to make your own creations. I am on Facebook (search abijamtastic) or twitter @hookingcrazy so please do send me your pictures :)

I am still plugging away at the chair, the squares are taking a while to do. I thought I had them all sorted, I have made three of each colour and (according to my measurements) this seemed like the exact amount to cover the chair.
So I started repinning them on so I could see how to sew it all together but I hadn't taken into account the wastage at each side where there is a part of a square, and there is even more wastage on the back.

So no, not finished with squares afterall. I think I need to make one more of each colour, so another 18 squares in total and (fingers crossed) that should do it and I can start sewing it all up.

In the mean time I am really going to have to get out and sort out my little garden a bit. It is getting increasingly harder to ignore the weeds as they are now bigger than most of the plants. The garden has really taken a battering with all the rain and storms we've had recently so it needs a bit of TLC and looking after.
The first rose has opened up on my green fly and black spot ravaged rose bush.
The bedding plants in the tubs that haven't been decimated by slugs and snails are looking pretty.

Lots of work to do out there before it starts raining again, well it is the summer, rain is to be expected!

Thanks again for coming to see my little blog! 
XXX

Monday 9 June 2014

Stripes and squares

I do hope you have had a good weekend. Mine was a mixed bag, I got a stomach bug on Friday and it's only just going now. I have been so off that I couldn't even crochet! The thought of concentrating on anything other than not being ill was just too much.

I had started whipping up the back of my chair covering on Friday, while the sun was shining and I was feeling great, lovely sunshine!
Alas that is about as far as I got with it before the lurgy struck, until today. I am feeling loads better now so carried on with the stripes this morning and now have one finished chair back :)
As you can see it is a kind of wedge shape, this is so it fits nicely without too much overlap with the front of the covering. I ummed and ahhed about how to get this shape neatly with granny stripes, should I increase in the middle of the rows or add a few chains to the start and finish of the rows to make it increasingly bigger? Both of those options just did not look neat enough. Inspiration! Why not make it from the top down? It is so much easier (and tidier) to decrease with granny stripes,  just miss off a cluster at the start and end of the rows.
 
So I have been back and forth measuring it against the chair after each stripe so that it fits nicely. In hindsight it may have been easier if I had made a template in newspaper or fabric first, but this has worked just as well.
I've also tried to match up the strip around the front to the bottom of the back piece, hopefully this will make it look seamless, but that may depend on how well I put it all together:
I am very nearly there with the crochet part of the chair, just 20 or so squares to make and then A LOT of sewing; sewing ends in and sewing it all together. 
I have a surprisingly large amount of yarn left too, perfect as I am still trying hard not to start another blanket just yet but it's nice to know it will all be there waiting when I settle on a design. 

Happy hooky :) xxxx